

The bread we used to buy at the grocery store had 18 ingredients. 18?!
Food is an incredibly important part of our lives and something to which I pay ridiculously close attention. So when I realized I couldn’t pronounce about half the ingredients in our bread, I decided to make a change.
I wanted to try my hand at making our own bread but didn’t want to make an investment in a bread machine until I knew we would enjoy it. Now, I’ve been making bread without a bread machine, with six ingredients (one of which is water) for ages!
Homemade bread tastes better, has fewer chemicals, and costs significantly less. Two one-pound loaves of bread used to cost us $2.99. Now I make two loaves for $0.55!
Making bread is a simple process. But if you’ve never worked with yeast before, it can be a little daunting. To help you get started, here is a complete, step-by-step guide – with pictures! – showing how we make bread without a bread maker every week.
(Note: I am not a fancy food blogger, so don’t judge the photos too harshly! I just snapped them while baking with Fuss Fish last week.)
Related Post: Complete Guide to Stop Wasting Money On Groceries
Table of Contents
What You Need to Make Sandwich Bread Without a Bread Machine
Bread machines can make it incredibly easy to have fresh bread on a regular basis. But they can also be expensive! Especially if you want one of the machines where the bread doesn’t come out shaped like a cube…
Luckily, you don’t need a costly machine or lots of hard work to make yummy bread at home. In fact, all you really need is a large bowl where the dough can rise and a good, durable loaf pan. Because once you start making your own bread, you’ll never go back to the store-bought alternative!
After trying a few over the years, my favorite is the OXO Good Grips Non-Stick Pro Loaf pan. I have two and they have lasted through many, many loaves of bread. They cook evenly, the bread slides right out, and they are easy to clean.

With that, you are ready to go!
How to Make Sandwich Bread
Making bread is an easy process, but I am going to walk through it in intricate detail to help you get the best results!
With both stages of rising, it can take about three hours before your bread is finished and out of the oven. However, 90% of that time the dough is just doing its own thing. You leave it to rise and go about your day.
Good luck!
Step 1: Gather Your Ingredients
To make the process as quick and easy as possible, line up your ingredients before you dive in.
- 2 ¼ cups warm water (not boiling) – Free
- 1 package active dry yeast (2 ¼ tsp) – $0.12 per recipe
- 6 ½ cups all-purpose flour – $0.34 per recipe
- 3 Tbsp sugar – $0.03 per recipe
- 1 Tbsp salt – $0.01 per recipe
- 2 Tbsp canola oil – $0.05 per recipe
We buy all our ingredients in bulk from Costco or when the 5lb bags of flour are on sale at the grocery store. Our total cost per recipe comes out to ~$0.55. Or $0.28 a loaf!
Pro tip: Professional bakers weigh all their ingredients. Once you get in the habit it is much faster and means a more consistent end result. Plus, less dishes since you don’t have to use measuring cups!
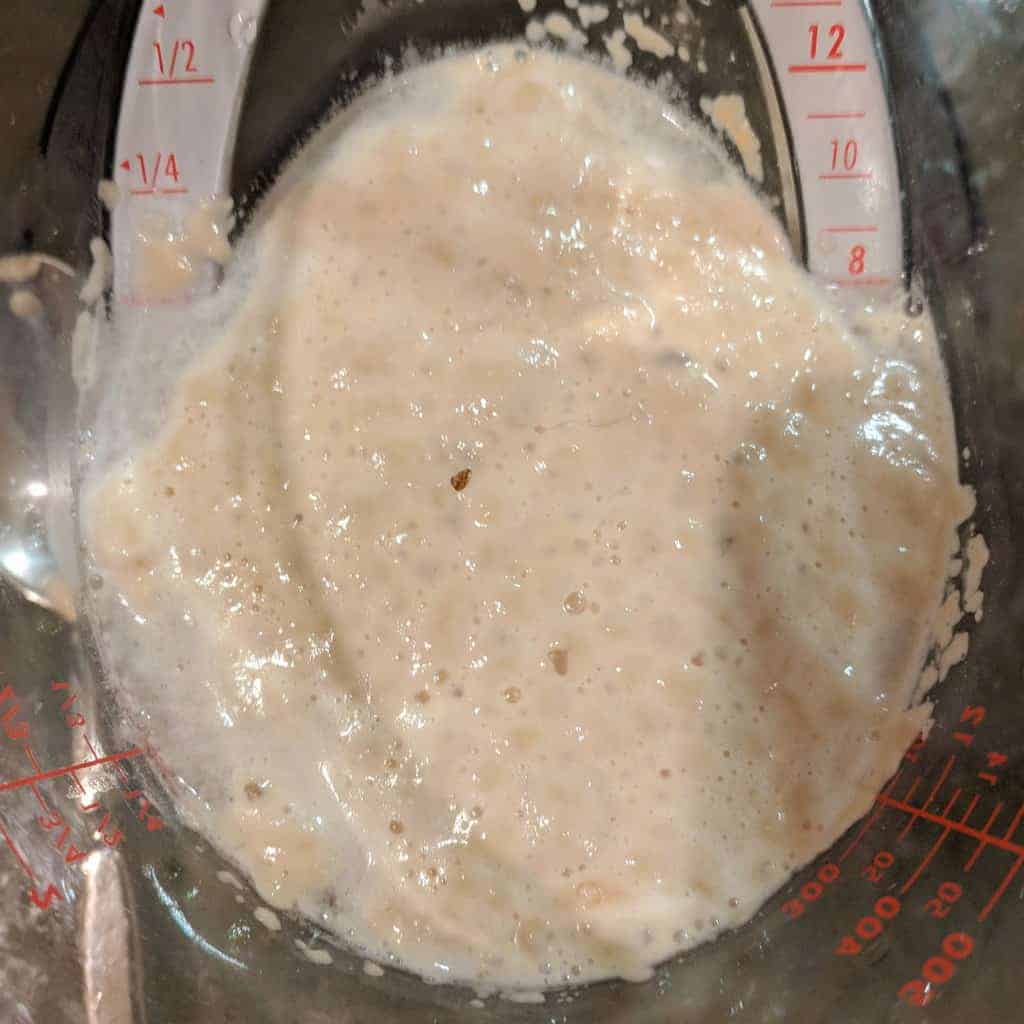
Step 2: Proof Your Yeast
Add your package of dry yeast into the warm water and stir gently to dissolve. Allow the mixture to sit for 4 to 5 minutes. If the yeast doesn’t bubble up, it isn’t active and your bread won’t rise.
Step 3: Make the Dough
In a large bowl, (I use our KitchenAid Mixer), add the yeast mixture, sugar, salt, canola oil, and half the flour. Mix until smooth.
I use the regular mixer blade for this process, you will switch to the dough hook later. If you use the regular blade, just watch for the dough climbing its way up into the mechanism where you connect the blade to the KitchenAid! That can make a huge mess. The dough hook has a plate to prevent this travesty, but the regular blade doesn’t.
It should look like this:
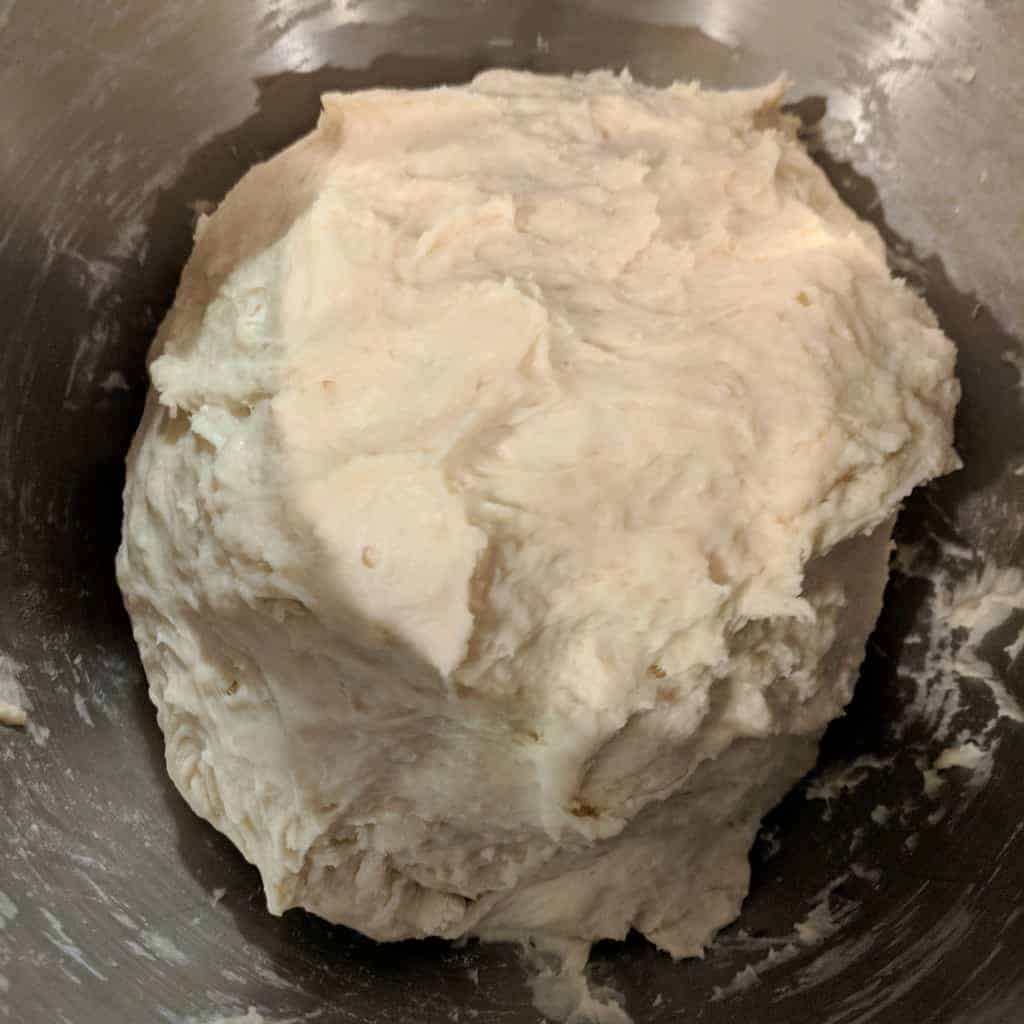
Then, start adding the rest of the flour a half cup at a time. You want to form a soft, smooth dough.
Step 4: Knead the Dough
If you have a stand mixer, like my KitchenAid, you can now switch the mixer blade to the dough hook. Knead on medium speed for 7 to 8 minutes.
Pro tip: If you have entry-level KitchenAid like me, this will be a lot of work for it. Just keep an on eye your machine or it might “walk” itself right off your counter…
If you don’t have a mixer, you can turn the dough from Step 3 onto a floured surface. The flour will keep the dough from sticking. Then just knead with your hands for 8 to 10 minutes. You are massaging and working the dough and you will feel it get a little firmer.
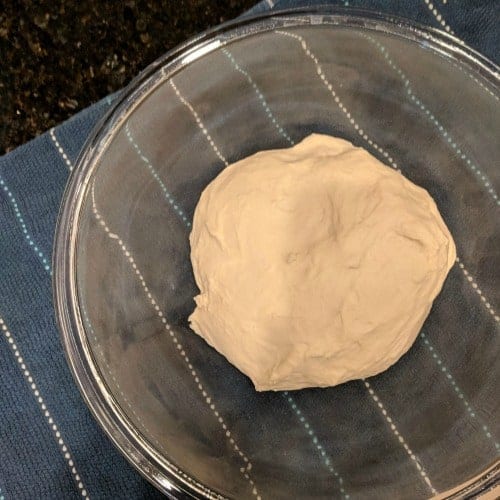
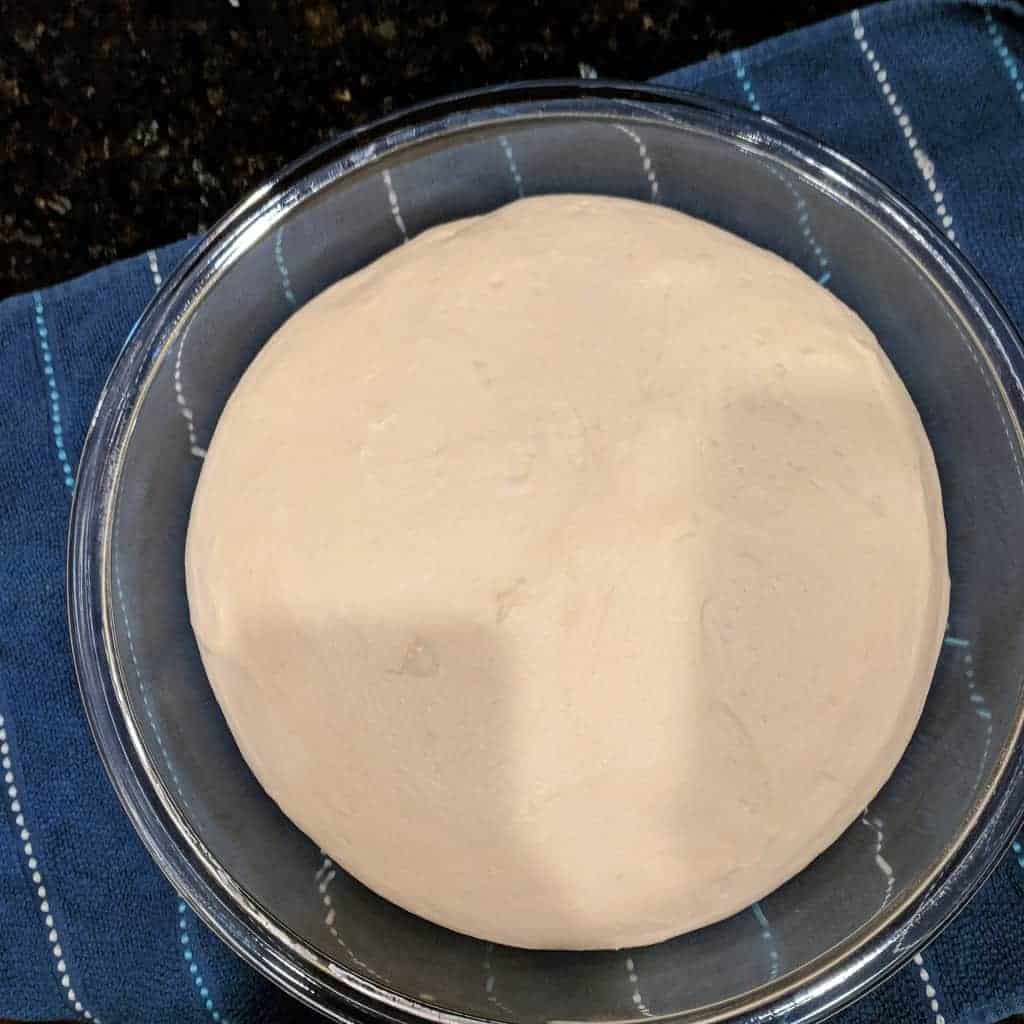
Step 5: Let the Dough Rise
To let your bread get nice and fluffy, you now have to let it rise.
Take a large bowl, glass works well, and grease the interior. I like to just put a little oil on a paper towel and run it around the inside of the bowl.
Then, turn the kneaded dough into the bowl, cover, and let rise in a warm place until the dough has about doubled in size. My glass bowls come with plastic covers, but you can also put a warm, damp dish towel over the top of your bowl.
Step 6: Form Bread Loaves
Uncover your risen dough and “punch” it down. You’ll be pushing some of the air and rise out of it to help you get it out of the bowl.
Roll the dough out of the bowl onto a floured surface. Divide the dough in half.
Form each half into a loaf and place each loaf in a greased loaf pan.

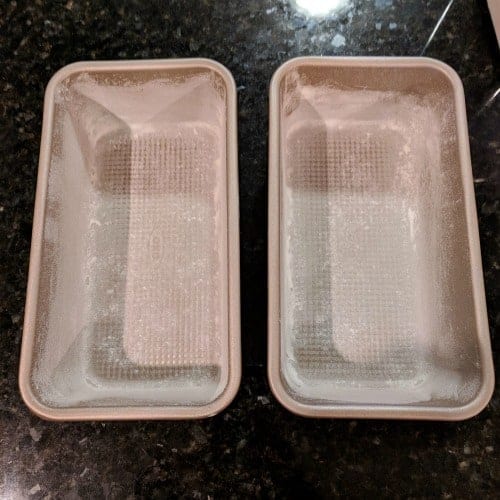
Pro tip: When you grease your loaf pan, you can use canola oil like you did for the proofing bowl or butter. But then lightly powder the inside with flour. Be sure to knock out any extra flour over the sink before putting the loaves in. This extra step will almost ensure the bread doesn’t stick or end up with a burnt crust! The pans should look like this:
Step 7: Let the Bread Rise AGAIN
This is where the patience of making bread without a bread maker comes in. You have to let the bread rise a second time, otherwise, your finished product will be very dense.
Cover your loaf pans and let the dough rise until doubled in size. This should take 30-45 minutes.
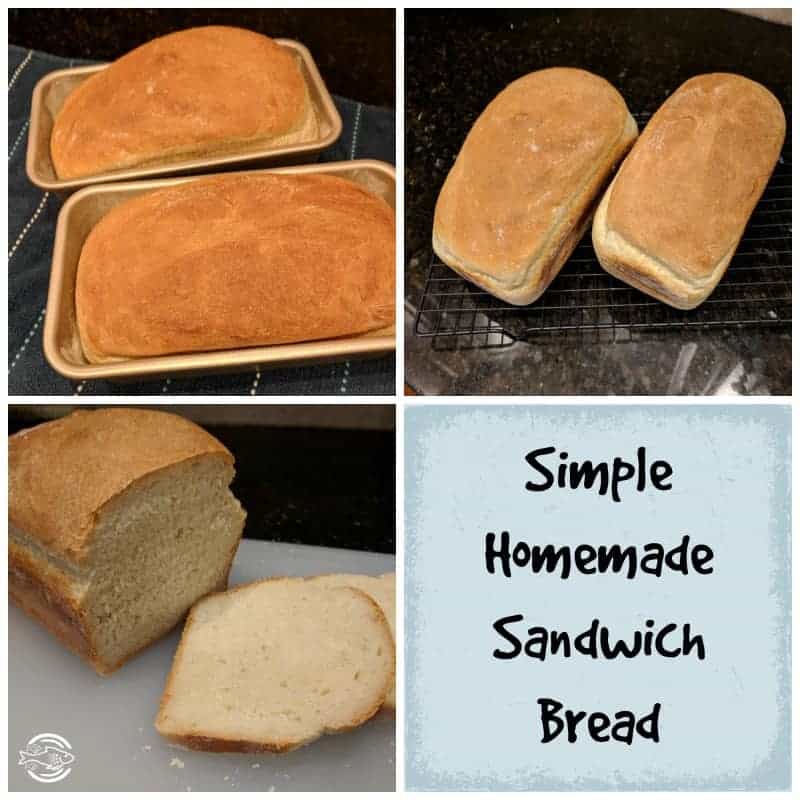
Step 8: Bake Your Bread!
Preheat your oven to 375* for 30-35 minutes. The loaves should look golden brown and sound hollow when you tap on them.
Remove bread from oven and place on wire racks to cool. Do not try to remove the bread until it has cooled! This will help it come out easier. Just turn it over and tap the bottom of the pan gently. (Mine usually slide right out when I start to tip them over.)
And that’s it! You have two beautiful loaves of fresh bread!
Will You Try Making Your Own Bread?
Making bread requires few gadgets and the most important skill is patience! Knead the dough and give it enough time to rise and your end result will be perfection! My oldest is only two-years-old but he already helps me make bread each and every week. (Admittedly, his input is mostly turning the KitchenAid on and off and telling me it, “looks done!” Still, an adorable sous chef!)
So, will you try to make your own bread? Drop a note in the comments and let me know!

You make it sound so easy. Thank you for these easy to follow instructions.
I tried this recipe for the first time today and just finished eating the first slice of warm fresh bread and boy was it delicious. I used instant yeast but it didn’t bubble to the top like regular yeast does, well it did a bit, but most of what did rise to the top floated right back down to the bottom. This made me a bit worried so I added about 2/3 of a package to the dry ingredients and then added the yeast mixture. Next time I’ll try mixing the instant yeast in with the dry ingredients to see if there’s a difference. I also don’t have any bread pans yet so I just used a regular cookie sheet to bake two round flatter loaves. Depsite the little changes I had to make, the bread still turned out delicious! Thank you for sharing this recipe. It was much easier than I thought it would be. I’m definitely going to make this again!